
Hello Guys,
This is a quick example of how we can add a column in Laravel migrations.
In this article, We will be discussing how we can add a new column in the existing table using Laravel Migrations.
No worries, if you don’t know how to create migrations in Laravel, will discuss that as well.
Here is a command to create a migration file in Laravel.
1. Go to your Laravel installation directory, open CMD ( For windows user ), and copy the following code to create a migration.
php artisan make:migrations add_column_to_users_tableThe above command will create a migration file that will be used to add a column to the existing table.
Now you have successfully created a migration file, now open that file
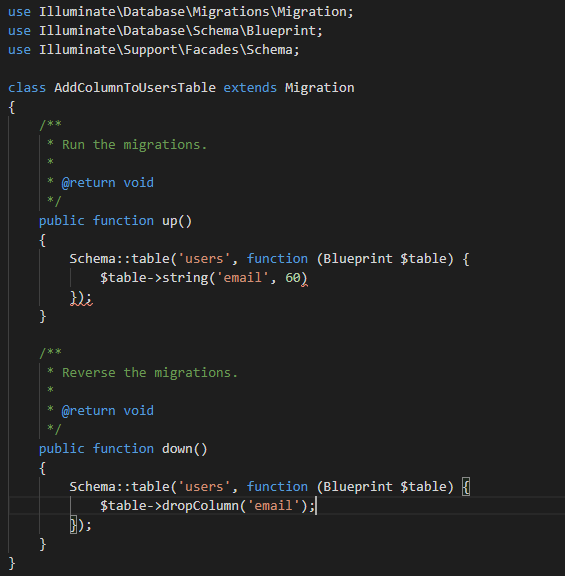
In the Up method, add the following code
$table->string('email', 60);

Let's add the column if not already exists

 if( Schema::hasColumn('users', 'email' ) === false ) {

	Schema::table('users', function (Blueprint $table) {

		$table->string('email', 60);

	}

 }
The above method will only add columns in the table if the specified column is not already present in the table.
That’s it. In the Down method, you can add a command to drop the column.
If you also would like to check out How To Drop Column In Laravel migrations.
Glad you read it all.


Leave a Reply